
When starting in Volleyball lots of us can be in for a shock.
When you watch the game of volleyball it always looks so easy.
In fact it looks really easy right until the point that you actually start trying to play it.
Now Volleyball in itself isn’t a difficult game and when you have the fundamental skills figured out, it’s amazing how quick players can improve.
The thing I think that is far more important than actually being able to perform the skill is understanding how and why we perform a skill in the way we do.
In this article I am going to cover some unique drills that will help you or your team you’re coaching learn the fundamentals of each skill without even realising it.
Some fantastic coaching points you can add to this is after each drill ask the team what they think the drill was intended to show.
Table of Contents
The Three Fundamental Skills Of Volleyball
Now there are three core skills in Volleyball and these are:
- Pass/ Dig
- Set
- Spike
Now to learn exactly what each skill is and how you perform them I would suggest clicking on the relevant skill to be taken to a full article detailing how to perform each skill.
To start off the drills I am going to cover passing.
Volleyball Passing Drills for Beginners
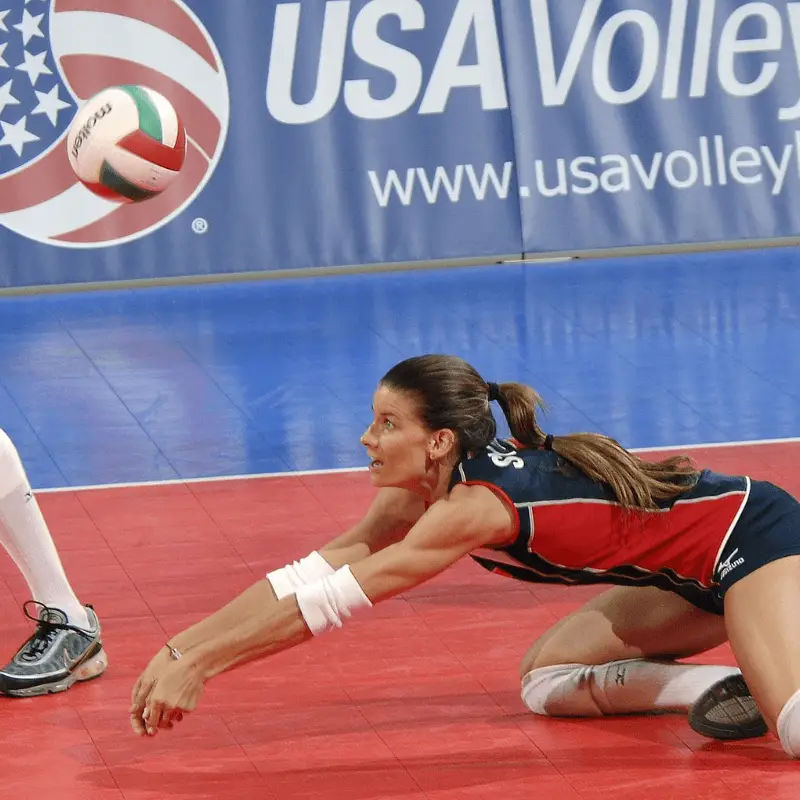
The first thing we want to do is teach each player what the ready position for passing is.
In simple terms the ready position for passing is as follows.
You want to have your legs just over shoulder width apart with your weight being on your toes not on your heels.
You’re knees should be bent and you want to ensure you are not sitting backwards but instead your knees over your toes.
This way your weight stays on your toes allowing you to react quicker.
We should be bent forward so that we could straighten our arms and rest them on our knees with no discomfort.
We need to ensure our core remains strong and we are not hunching our back too much as this can lead to aches and pains.
The last thing we want to do is get our hands and arms ready.
Your hands should be out in front of you at about lower rib cage height, your hands should be palms facing down like you are warming them up over an open fire.
By having our hands in this position we are able to quickly form a passing platform or take the ball overhead with open hands as needed.
Once you are satisfied all players understand this positioning we can get into the drills.
The shuffle Drill
Now all good passers will tell you that the pass starts with your footwork and legs.
This drills encourages players to learn how to move correctly to ensure players learn to get their bodies round the ball rather than passing out of their body lines.
In volleyball we want to try and ensure our full body is balanced and fully behind the ball as this offers much more stability and if the ball moves slightly we have a larger surface area and range of motion to work with.
To do the shuffle drill you will want to partner up the players and give them a ball per pair.
One person will be the roller and one person will be the shuffler.
The shuffler is to get in the ready position and you are to task them with trying to keep their head at the same height the whole time. We don’t players standing up, shuffling and then getting back into the ready position.
This consumes a lot of wasted energy and also means the player might not be able to form the ready position and pass in time.
Once this message has been relayed the roller is going to simply underarm roll the ball to one side.
The shuffler must shuffle step to the ball and let it roll between their legs.
It is very important the shuffler does not turn and run nor do they cross their legs when trying to get to the ball.
The aim of this drill is to force players into shuffling into the correct position where they can remain in the ready position and react to pass the ball. As opposed to standing up ,running to their position and then not being ready for the ball, or alternatively crossing their legs and being off balance with the wrong body shape.
This drill is perfect to teach good movement, getting your body behind the ball and ensuring you have a nice wide stance when the ball reaches you.
Between The Legs Drill
One footwork is perfected the next common issue beginners have, is they try and play the ball too high or in an upright position. This often causes the ball to go directly up or worse behind them.
We want to ensure the ball goes upwards and back towards the setter or the net.
When passing in volleyball we always want to try and ensure we play the ball between the height of our hips and our feet.
This allows us to create a better passing angle to ensure the ball goes upwards and in the right direction. It also causes a lower centre of gravity which makes the passing platform a lot more stable.
To perform the between the legs drill you will need pairs again.
One feeder and one between the legs player.
In this drill you want to again get your player in the ready position. The feeder will throw the ball up and towards the player.
The feeder is aiming to make the ball bounce just in front of the between the legs player.
It is the between the legs players job to shuffle to meet the flight of the ball and then let the ball go between their legs without it touching their body.
If the ball bounces up and hits the players stomach, they are not getting close enough to pass.
The ball hits the player before even bouncing then the player is far too close to the ball to pass.
Obviously there will be an element of how well the ball is fed in so just ensure you monitor a few attempts before critiquing.
One thing we really want to encourage is that players are stopped before the ball reaches them and that their feet do not leave the floor.
This drill ensures the passer keeps the correct distance from the ball and if they were to pass would they would be taking the ball between their hips and knees.
It also encourages the passers to stop before playing the ball and offers a balanced a stable platform.
The Pepper
Right so we have taught the players the ready position, the correct movement and distance away from the ball that we ideally want to achieve.
The next thing to do is introduce the platform and put all these skills together.
This drill is technically a pairs drill however it can be done solo against a wall if needed.
The pepper involves passing the ball back and fourth as a pair.
We want to ensure the passers remain low and in the ready position and when they do finally play the ball using their platform that they are using the extension of their legs to pass and not swinging their arms.
Hopefully with the drills above if they remain in the ready position they will naturally have to use their body weight and not just rely on their arms.
The other thing we want to ensure is that our passers hips are facing our targets as much as possible.
If the player shuffles left they want their left foot slightly in front of their right to create that natural angle back to the passer.
If the player shuffles to the right, the opposite is true and they want their right foot slightly further forward.
Hopefully these drills will help get you or your players passing with good technique. But more importantly hopefully it helps the players understand why they did that technique in the way they did it.
Volleyball Setting Drills For Beginners
Now I do have one fun drill however it isn’t going to be suitable for everyone so I would suggest just make sure your players are okay with this before rolling out the red carpet for it.
Heading Drill
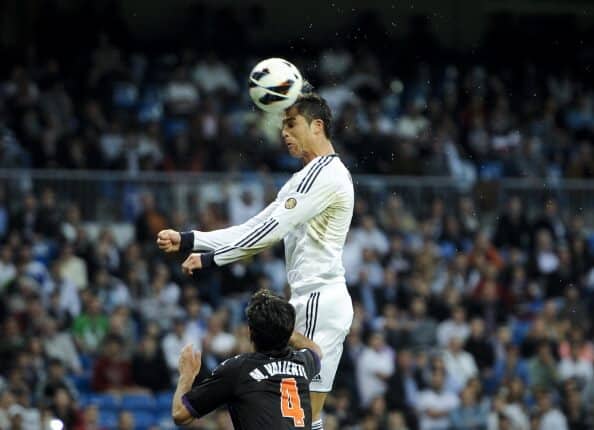
Now if you are a more experienced player you may have already realised where this one is going.
In volleyball when setting we want to ensure our hands are in the correct position and we are facing our target as much as possible.
It has happened to all of us when we go to set and our hands are too wide apart so the ball bounces off our forehead.
Or at least it happened to me a lot when I first started.
I remember the first few times it happened feeling a bit stupid but my coach quickly stopped those feelings by uttering these words.
It means you are trying to set correctly if the ball hits your forehead.
When we set in volleyball we want to also try and ensure we take the ball in our eye line above our heads. If we have our hands too wide the ball would bounce off our foreheads.
This is where the heading game comes into play.
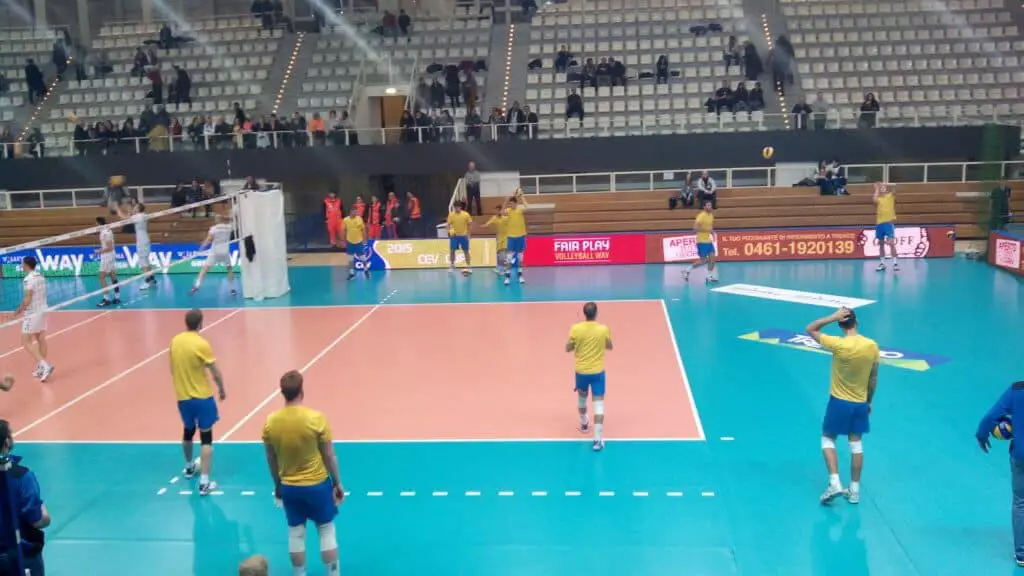
You will need one feeder, one setter (or headerer) and one player stood in the 4 position.
For those unclear see below image indicating where players should stand.
The feeder will throw the ball in a nice loopy action towards the setter.
The setter’s job is to get their feet round the ball and header it towards the 4 player.
This drill will teach players to get their feet round the ball so that their body is facing the target and it will also teach where and what angle you want to be setting from.
Correct Hand Position
Once you have used the header drill or if the header drill is not suitable you will want to start by teaching the players the correct hand position.
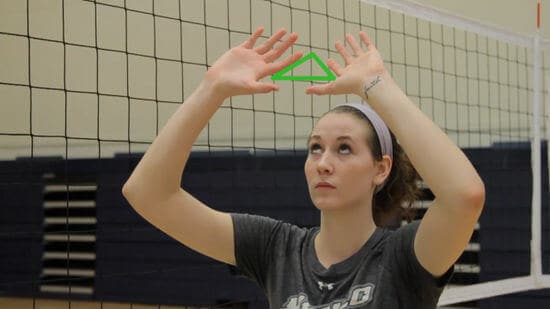
The correct hand position to set is the following.
You want to hand your hands evenly spread and above your head.
Next you want to create a separated triangle with your thumbs and forefingers.
It is important that the space between your thumbs and forefingers is equal at all times.
With your remaining fingers you want to spread them gently to offer a large surface area and also this allows the player to wrap their fingers around the ball when setting.
See below image if you are unsure of the correct hand position.
Throw and Catch
Once the players understand the correct hand placement we can move onto the next step.
This is a very simple drill in which we simply throw and catch the ball in the setting position.
This is something that is best done individually so no need for pairs. Although it is important to have enough volleyballs.
To perform the drill get your players to throw the ball up high enough that they have time to get their hands ready.
As the ball begins to fall the players will bend their knees slightly, as the ball contacts their hands in their setting position they will allow themselves to bend a little bit more as they absorb the impact of the ball.
Repeat this process until all players look comfortable in their body and hand position.
Throw, Catch & Push
The next step is the throw, catch & Push.
This drill is exactly the same as they above drill however it incorporates the actual setting part.
Once the player has caught the ball the next step is to push it to a target by straightening not just their arms and wrist but their entire body.
This is why it is so important to ensure players bend their knees when taking the ball in ready to set.
When pushing the ball away we want to ensure the ball leaves our hands evenly and at the same time.
This will ensure we do not double touch.
One thing that I was taught when I first started setting was ‘think french doors’.
If you think of a double set of french doors that go into your back garden.
Imagine opening both of these doors at the same time to let the light and sun fly into the room.
If when we extend our hands and arms we push our hands away from each other like french doors, if that ball doesn’t spin we know that it must be leaving both hands at the same time.
As players become more comfortable with this we want to decrease the time the ball remains settled in the players hands.
In volleyball it is important that the setter quickly takes and releases the ball.
If the ball comes to rest it will be called for a carry.
In the early days of setting it is absolutely fine to take things slower however don’t let the players form bad habits by keeping hold of that ball for too long.
Moving to the Target
The last drill is one I like to call moving to the target.
For this drill you will need some tape or something similar to mark some spots on the court.
What you want to do is place the setter in their traditional starting position and make a semi circular around them using 5 pieces of tape. This pieces of tape will be placed evenly apart and will mark setting locations.
Once you have the tape down on the floor you will need someone stood in the 4 position, one setter and one feeder.
The feeder will throw the ball up in the air at which ever taped position they like.
The aim is to keep the setter guessing.
The setter must move their feet to which ever taped location the ball is thrown to and make sure they get their body round the ball to set to the catcher at 4.
This drill is designed to make the setter move their feet and get their body position correct to make setting much more consistent.
This drill is intended to replicate game situations in which the pass will not always be passed perfectly.
Due to this the setter must work on moving to meet the flight of the ball and make sure they always have their shoulders facing the target, at least in the early stages of learning to set.
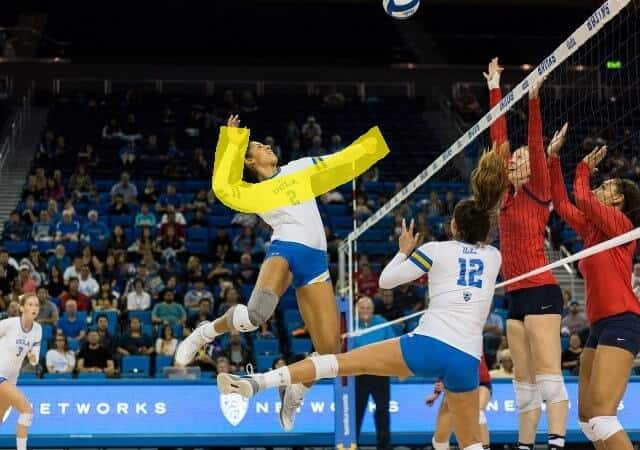
Volleyball Spiking Drills For Beginners.
Spiking or hitting in volleyball is the glamourous thing that everyone wants to do brilliantly with great power.
In order to be an amazing hitter we really need to master a few key movements.
The first movement to master is the arm swing.
Correct Arm Swing for Spiking
The arm swing can be broken down into 3 key phases and that’s the first drill we want to do.
The Nike Swoosh
The first part of the arm swing is the Nike Swoosh.
Now why do I refer to it as the Nike Swoosh.
Well that’s because that is exactly what it looks.
The first thing we want to do is place our non dominant hand in front of ourselves and towards the ball. Not only does this act as a guide but it also helps up make sure we jump with our shoulders level rather than leaning to our dominant side.
With our dominant hand we want to create a 90 degree angle from our guide hand in front of us.
This allows us to open up our hips for a full rotation. This helps us create a whipping action across our body to increase hitting power.
If done correctly this should resemble something similar to the Nike Swoosh.
Leading Elbow
The next phase of the arm swing is called the leading elbow.
At this stage our non dominant arm will begin to fold inwards towards our body and will rest across our chest.
This allows us to create more rotation when hitting and also helps us avoid unnecessary net touches with our other hand
With our dominant hand we want to push our elbow forward so that our elbow is leading the charge towards the ball.
The reason we want to lead with our elbow as it creates a larger lever for us to attack the ball when we swing.
The last phase of the hitting action is the fun part.
The actual spiking part.
The Whip
In the last phase of the hitting action we want to fully stretch to ensure we contact the ball at the highest point. At the point of contacting we really to whip our body to create as much power as possible.
Notice I said body and not arm?
Well yes it’s true we want to whip our arm but by utilising the full bodies momentum we can generate much more power with the swing.
Compilation
The last thing you want to do is compile all those phases until the look smooth and effortless like a well oiled machine.
Now we have the arm swing down the next key movement is the footwork approach
Three Step Approach
When jumping in volleyball we want to ensure for the most part we are jumping vertically upwards rather than forwards.
There are a few things we can do to help this such as using our arms to swing upwards and keeping our chest upwards rather than leaning forwards.
However, one of the most important things to master is the footwork.
In volleyball we generally use what is known as the ‘three step approach’.
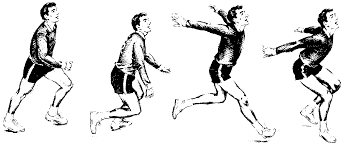
The three step approach is quite simple being that it is only three steps.
To start the three step approach you will want to take a large step forward with your non-dominant leg. The second you land you want to take two very small quick steps before using that energy to jump directly up.
An example of this would be as follows:
I am predominantly right footed, due to this fact when I see that set coming my direction I will take a large step forward on my left foot before quickly taking a quick two step approach.
The second both my feet touch that floor in the final two steps I want to use all the momentum and energy created to propel me upwards.
Hitting Over The Net
Now we have the arm swing mastered and the approach worked out, it’s time to start putting the pieces of the puzzle together.
I would recommend the best way to do this is by having one feeder and one or a line of hitters (Depending on group size)
The feeder is simply going to throw the ball upwards to a nice height that gives the hitter time to figure out their footwork.
The feeder will replicate a setter so we want to throw the ball upwards and towards the 4 position as if the ball had just been set.
From here the hitter is going to use the approach just learnt to meet the ball at its peak and then jump and attack it with their newly armed swing.
The aim of this game is to land the ball over the net and hopefully in the court.
If they find this to be easy I would suggest putting in some scoring zones.
For example you may split the court into quarters from the net to the base line.
If they land the ball in the two sections nearest the sidelines they get 3 points, if the ball lands in the middle two zones they get 1 point.
If they hit the net and don’t make it over the hitter gets 0 points.
If the hitter does get the ball over but the ball lands out they get 0.5 point.
First person to reach 15 wins.
Now you may be confused as to why I added the 0.5 point for a ball that makes it over but lands out.
Well the simple reason is, as long as the ball makes it over the net, the other team has to make a decision as to whether to play ball or leave it.
In the middle of intense rally you would be amazed how often balls are touched or chased down that are clearly going out, just out of fear of losing the point.
So in my eyes we want to encourage players hitting the ball over even if it may be out. As long as the ball goes over the net it is in play.
So there you have it.
Some simple and fun games that can teach absolute beginners the fundamentals of Volleyball.
Hopefully this has given you some ideas that you can implement into some trainings to freshen up a session.
Alternatively if you are reading this and want to improve yourself many of these drills can be practiced with just one other person. That could be a parent, friend, teacher.
You name it, anyone you can find to lend a hand will drastically help you improve at the basics.