
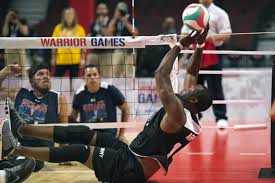
Setting is one of the hardest skills to learn and master, as such it is often left to just one person in the team to be the designated setter.
In most cases that system works just fine and more often than not the setter will take the second the ball and distribute it to the rest of the team.
However there will be some situations in which the setter takes the first ball or alternatively the pass just isn’t good enough for the setter to get.
In these situations I think it is very important that other players on the team can set the ball.
That’s why I believe setting should be a skill taught to players of all levels but in particular, beginners.
By teaching beginners to learn to set it will not only add another skill to their arsenal but it will also make them far more comfortable setting the ball when required.
Even if they have no plans of being a setter I think it is a skill that must be taught.
Now before we get into any setting drills it is important that we ensure everyone understands the correct technique when setting to give them the best chance of performing the skill efficiently.
Table of Contents
Setting Technique
Setting is very much an art but that doesn’t mean that every player can’t perform a good set.
Like most actions in volleyball that skill starts with the legs and footwork.
The first thing we want to do is face towards our target with our feet just over shoulder width apart and a slight bend in our knees.
We want to ensure our knees are over our toes to ensure we have good balance and can easily generate power in the direction that we are going to set.
The next thing we need to look at is hip and pelvis location.
We can use our hip location to really help when setting the ball.
For example, if we want to set a long distance we want our hips behind the ball as we can use our hips driving forwards when setting to generate more power, however, if we want to set directly up and down in front of ourselves it is much better to keep our hips underneath the ball more.
Now this is where things start to get a bit more technical and much harder to explain.
The first thing we want to do is place our arms and hands in front of us at roughly a 45 degree angle from our forehead.
We want to ensure there is a slight bend in our elbows to make receiving the ball a softer and more seamless process.
When it comes to the hands everyone will have their own position that allows them to feel comfortable.
What I get seen taught a lot is to make a triangle with your thumbs and forefingers with the remaining fingers spread out to offer a larger surface area to encapsulate the ball.
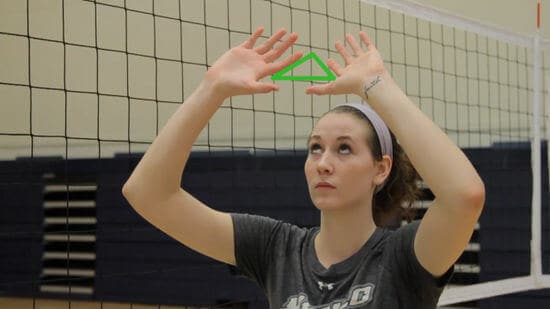
One thing we do want to ensure is that once we have made this triangle shape we ideally want our thumbs to be facing more towards our forehead than each other.
The main purpose of what we are trying to achieve is we want our hands to fully encapsulate the ball when setting, our hands should almost form a bowl around the ball, for those of you who have heard the term deep dish, this is exactly where it came from.
Trying to create a nice deep dish to set the ball with.
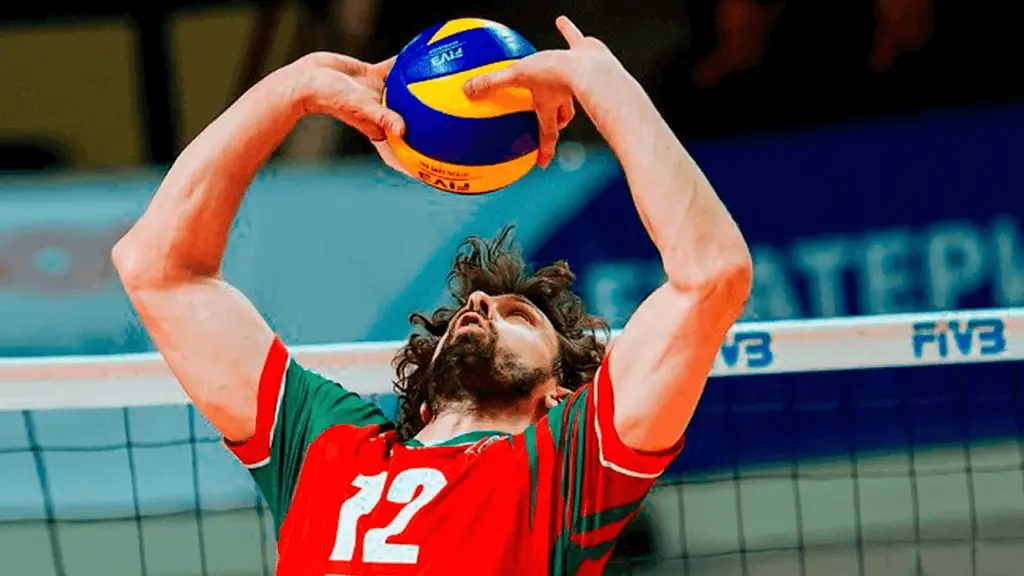
Now we have the basis of the correct technique it is time to piece this all together and try a set.
The first thing we need to consider is where we want to take the ball before we start the setting process.
This may feel a bit foreign at first but when setting we want to try and take the ball in a position that if missed the ball it would bounce of our forehead.
Much like a soccer player heading the ball at goal.

As embarrassed as you may feel, if you miss the ball and it bounces off your forehead. Don’t get discouraged as this actually means you are on the right track.
When the ball contacts your hands the first thing you want to do is initiate more or a bend in your elbow to try and match the ball’s speed as it lands in your hands.
This allows you to get a much better grip on the ball to perform a nice clean set.
As the ball contacts your hands and you bend your arms slightly, spread your fingers around the ball to form that bowl shape.
Once you have taken the ball and carefully gathered it in, it is time to push that ball away.
We want to ensure we don’t allow the ball to rest in our hands for too long.
We want to start the setting motion by extending our legs and full body in the direction that we are setting.
As you begin to extend your legs and body, start extending your arms. The full motion should like a spring that has been pushed down into the floor and is exploding upwards after being released.
As we release the ball I like to teach the french door principle.
If you imagine a set of french doors being pushed open together to let the sunlight beam in, this is exactly what I want you to do with your hands.
The main purpose of this is just to ensure you release the ball from both hands evenly.
If you push both your hands away from the ball and it doesn’t spin in any one direction your can be confident in the fact that it is not a double touch.
This is a great way to self judge your sets.
As you get more comfortable with this you won’t necessarily need to do this as you will start to get a feel for what a double touch is and isn’t.
Feed, Catch and Push
It is time to put the technique to practice and help the players understand how the movement and motion will feel.
For this drill you will need at least one feeder, one setter and one catcher.
To perform this drill ask all setters to line up off the court next to the 2 position.
I would suggest the feeder stands near the middle of the court in the back row with all the balls.
The catcher I would suggest stands at the 4 position as this is the most common setting location and generally the easiest to practice when just starting.
The first player from the line will step on to the court and stand in the setting position.
The feed will throw the ball up towards the setter.
The setter’s job is to move to the ball ready to set and face their target.
Once they have met the ball the must catch the ball in the position they would adopt if they were setting.
Once they have caught the ball they are to bring their arms down and then push the ball towards the target.
The idea of this drill is to help teach the players how the setting motion should feel and also how to move to meet the ball.
When setting generally when moving to meet the ball it is far more beneficial to take little shuffle steps in order to meet the ball.
By taking little steps it allows for much cuter adjustments and also means you can use the momentum from your steps to push the ball to the target.
In the early stages of learning how to hand set I am far more concerned about teaching the correct technique and motion as opposed to worrying about carries etc.
It is much easier to speed up a skill once the players understand how to perform it.
For example, the first time we learnt how to write, every letter required a lot of focus.
However as we understood how each letter was formed and practiced it more, writing became not only a quick task but one that requires little thought.
Setting Fan Drill
The setting fan drill, is a drill designed to get people used to moving to the ball, getting squared off to the target and the art of setting from different angles and locations.
Regardless of whether players are beginners or FIVB World Cup champions there will always be times in which the pass isn’t in the right spot.
This is why it is so important to learn how to move to the ball or more importantly how to set from different angles and locations.
This is where the setting fan drill comes in handy.
The fan setting drill forces the setter to move into positions in which the ball would likely get passed to and have to set the ball to the same location each time.
For this drill you will need a feed, catcher and setter or setters.
The feeder will have all the balls next to them and they should start backcourt towards the 6 position.
The catcher should be at the 4 position to act as the target for the set.
The remaining players will line up on the side line by position 2.
The first set in which the setters will do will be from the base position which as we know is between position 2 and 3.
Depending on how many setters you have in the drill will determine how many reps you want to do however I would suggest a minimum of 3 reps in each position.
Repetition is the key to mastering any skill, it also allows you or the coach to notice any issues before they become habits.
Once the setter has performed their reps at the base position it’s time to get the setter moving.
The next feed should be thrown in front of the setter somewhere between position 3 and 4.
This position trains the setter to perform a different type of set, setting from this position requires a lot less power, however, depending on the hitter it may require a much higher loopier set.
Again I would suggest doing a minimum of 3 repetitions before moving onto the next location.
Ensuring that the setters always start at the base position and don’t cheat it’s time to move to the next setting location.
The next setting location is going to be very similar to the one above however you want to bring the feed closer to the 3m line. This will certainly be a challenge for the setter as they will have to work hard to get their body around the ball to get their shoulders squared up to the setter.
The next setting location you want to feed the ball just behind the 3m line between position 6 and 1. Although this is a much shorter distance for the setter to move it will again bring in a whole new type of set.
The last setting location will be from a deep 2 position. This is for them situations where the ball is passed to far over the setter. This will be one of the longest sets that any setter will do and will require the use of their legs and body a lot.
If the footwork isn’t right on this set it will certainly show in the distance of the set.
Now just in case you were curious as to why its called a fan drill it’s because the setting locations are meant to mimic the shape of a traditional fan like the one below.

Just incase you were unclear on the setting locations hopefully seeing the shape and understanding why its called the fan drill should hopefully help.
Sitting Down Volley
This next setting drill will sound a little bit strange it will go against nearly everything I have mentioned.
But hear me out as this is a method to my madness.
As I mentioned earlier, for me it is far more important to teach the correct technique as we can work on the setting speed later.
Well later has come.
For this drill you want to split the team up into pairs or if you are doing this drill on your own just find a partner.
Get a ball between the pairs and have one person in the pair sit down on the floor with their legs crossed.
Ensure the person sitting down is a reasonable distance from their partner before starting the drill.
The feeder will throw the ball to the sitting down player, the sitting down player will set the ball back to the feeder.
Because the person is sitting down they don’t have the luxury of using their full body to generate the power from the set.
Due to this fact the setter has to catch and release the ball very quickly in order to generate any substantial power.
This causes the setter to speed up their release a lot.
This can be a great drill to introduce when players understand the setting motion but still carry the ball for too long.
Quick Fire Sets To 4
The last drill is an extremely common one especially in warmups.
The drill is very simple and allows a setter get a lot of repetitions in.
For this drill you will only need 1 setter and either a feeder aswell or hitters of you can slow the drill down slightly and just have hitters and a setter
To start the drill have the setter stand in the base setting position (Which we know is between position 2 and 3), the rest of the players will stand near position 5 waiting to hit through 4.
As I said if you want to really work the setter the drill can be made a lot quicker by having a designated feeder.
If you chose to go down the feeder route you simply want a feeder to be stood at position 6 with a large stack of balls.
The feeder will throw the ball just in front of the setter near position 3, the setter will set the ball out to an attacking player at 4 (This will be the first person from the line of hitters)
The second the hitter has attacked, the setter must track back to the base position and find the next ball fed from the feeder to set the next person in line.
The drill will be repeated until all players have attacked the ball.
If you find this to be a bit chaotic I would suggest giving each of the hitters a ball so they can feed the ball to the setter themselves.
This will give the setter much more time to get back to the base position and reset before the next ball is thrown in.
Make sure that everyone has a go at the setting position before ending the session.
The main purpose of this drill is to put everything into practice that the setters have just learnt and also help improve the consistency of the sets.
Now all of these drills are geared to setting forwards and as we know there is other setting options available.
In the early stages it is far more important to get the technique right and make players feel confident with the setting action.
Once they understand the basics you can adapt some of the above drills to help the setters practice short sets, reverse sets and even jump sets.
Just make sure everyone on the team gets to practice setting as you never know when that middle who would have otherwise never set a ball may need to take the set to win you the game.